Sunday, 1 June 2014

Helms deep- Light at the end of the tunnel

SO... admittedly, very few posts as per usual but lots and lots of progress with helms deep, so swings and roundabouts. The project is now approaching completion, with most of the main structures finished and ready for painting (which should happen this week). This post will largely be a long list of pictures from different stages of the build, so if you have any questions about how it was built then just leave a comment.   

 In order to solve the problem i was having with the arches i scoured ebay and found the Hirst Arts Gothic Additional Accessories Mold #44


With which you can also cast these doors :)


 The inner wall under construction... i later used cardboard spacers to support the wall (in a similar way to the deeping wall sections).


 Inside the walls there is enough space for a wotr company to move around.


 The three decorative pillars were later cut to size.


Making the Gate.

A cardboard strip was used as a base for the floor.

Once dry, these gaps were filled with polyfilla.

After raiding the fish tank, the damaged wall section is almost finished.


Still in construction... the tower is slowly growing.


Its all coming together :)

After the pollyfilla.


Just another angle... i got abit picture happy.

Building the mountain... i used cork tiles for the base/sides.

landscaping... polystyrene makes up most of the base.
A newspaper core was covered with plaster bandages and then hard plaster was poured/brushed over the top.
Spray painted black for an undercoat, ready for painting.
man-made-mountains.... newspaper is used for the core of the mountain.


 And that's the project to date. I still need to raise the height of the tower, pollyfilla the floor of the keep, construct the stairs in the courtyard, create another couple of mountains, the causeway and the bases... not to mention all the painting.. so quite a bit.. but its getting there.

Feel free to comment. :)

Sunday, 2 March 2014

Helms Deep- A weekend of progress!


In a manner most unlike me, i have been incredibly productive this weekend and as a result have made plenty of progress with the helms deep terrain project- it'll be interesting to see how long i can keep this up for!


As with before, this post will mainly be a long list of pictures but i shall do my best to provide some sort of commentary-type-thing, explaining whats going on.


Firstly, i decided to break the mold in the way that i work and make a plan.. so, out came my trusty black marker and i set to work on the base for the keep. Being built into the side of a cliff, the base obviously would have to be quite high, so i rummaged around the garage and found some large sheets of polystyrene.


 I shaped them with my hotwire cutter and with a heated knife for the larger sections.


The sheets were then glued together with a generous helping of PVA and left to dry.


On to the outer wall...


Some more wall-maker panels were cast and glued to create the wall leading to the tower of the hornburg.


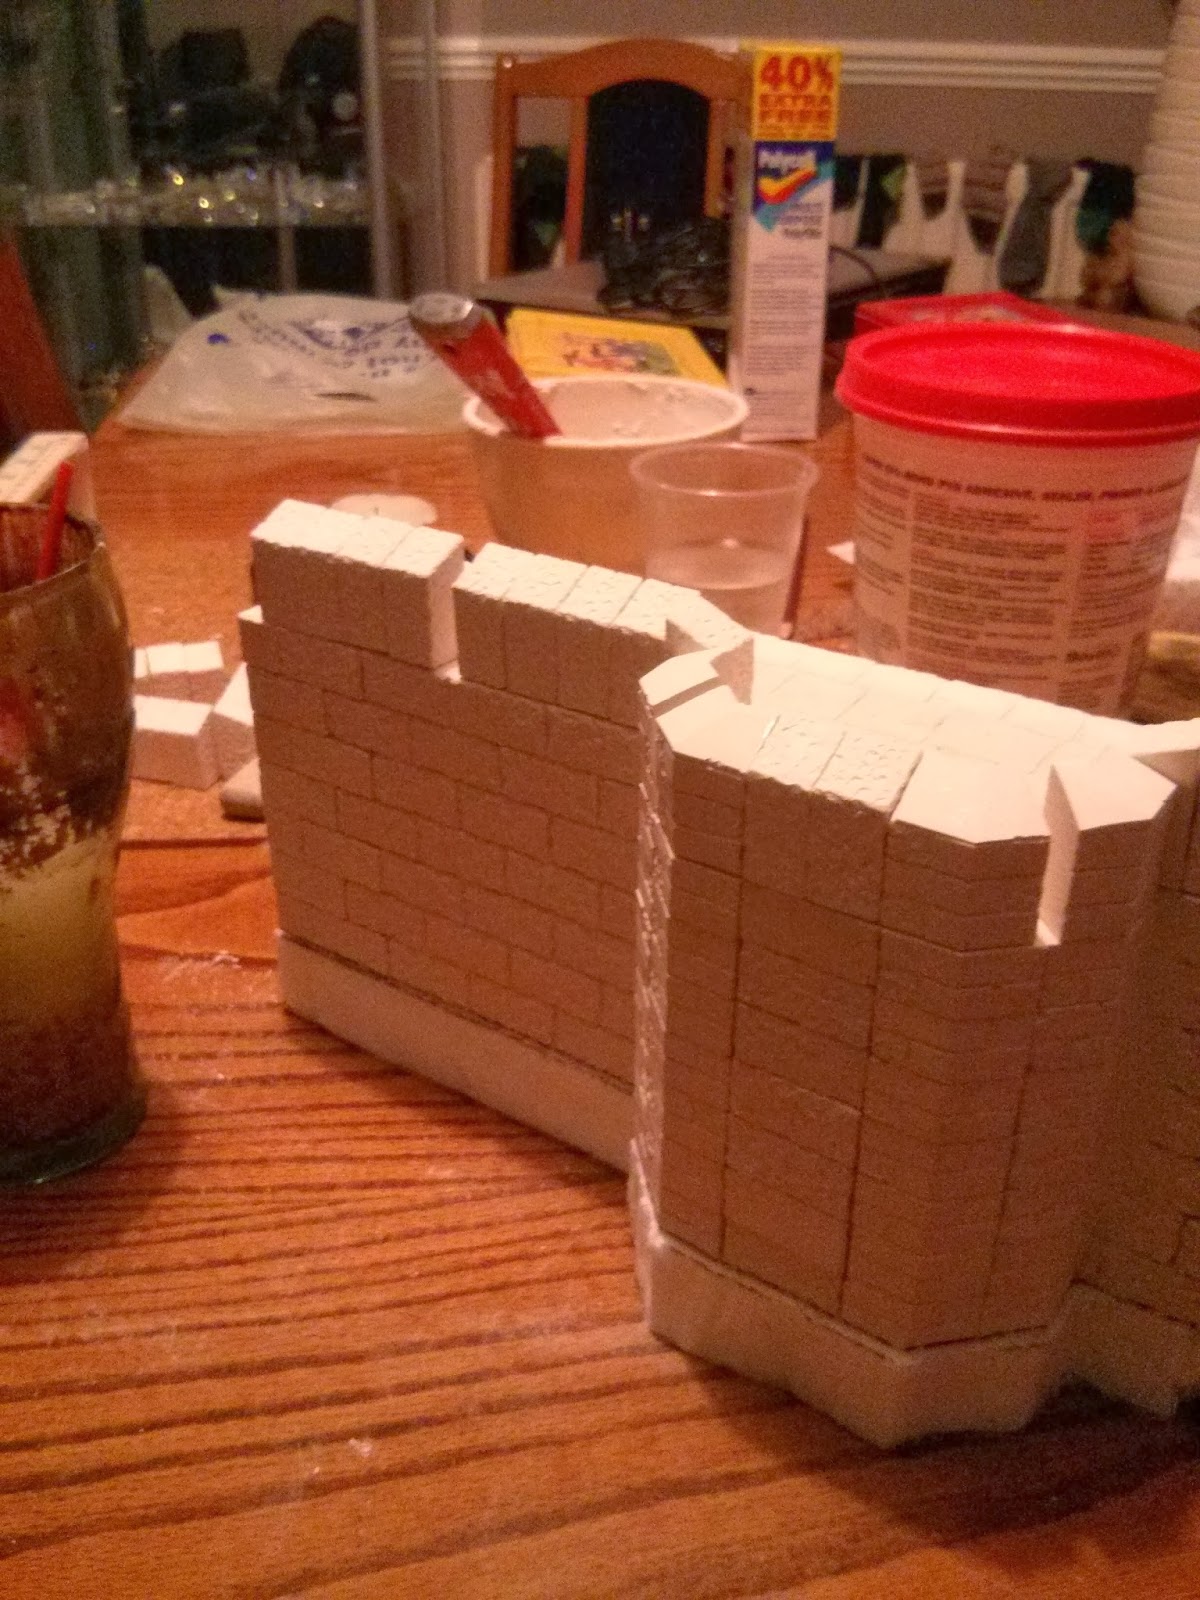
In order to make the wall bigger on the inside than on the out, i extended the interior with some basic blocks and the outside with polystyrene (ready to be shaped into rocks later).


Using blocks from the 8" circular tower i created a curve to the end of my wall section so that it would connect with the games-workshop gate house that i showed in the first post.

This was actually alot harder than i had expected, as the blocks have a nasty habit of not lining up straight and therefore required plenty of sanding to make level. (it should be noted that this 'problem' comes from my casting technique and not the quality of the molds.)


The curved wall and the tower (made from the octagonal tower molds as before) were secured using LOTS of glue from the hot glue gun and even abit of pva. The gaps were then filled using polyfila at a later date. 


By now it was getting very late, but i wouldn't stop until i'd finished the section.. dedication eh?


so i made some supports for the flooring out of some thick-ish cardboard, securing it with pva and the glue gun.


In hindsight i should have let that to dry first but in a rush to go to sleep i started covering the top of the wall with polyfila and doing my best to smooth it flat.


The next day i penciled on the floor tiles and using an old knife (not the one in the picture) i began to carve out the gaps between tiles. This alone took a silly amount of time but looked very effective when finished.


The next job was to create the battlements. In general these were created in exactly the same way as i did with the deeping wall.


 The one exception is the damaged and repaired section pictured here. To create this i found some miscasts that i'd kept from my early casting experiments and am planning on using either greenstuff or even small gravel to finish it of...


Clearly still a work in progress but certainly the making of a nice detail.

The build so far.. (minus the flooring and battlements)


After all of these photo's i actually raised the height of the cliffs further to make the keep even more imposing. The next jobs will probably be to continue working on the tower, which can be seen in some of the pictures and then to create the inner keep.. i started messing around with the blocks to check the size of the base etc. (shown above).

anyways, for now i'm tired.. and i've already inundated you all with enough pictures for today.. so until next time, i hope you're enjoying the project and accompanying blog- feel free to comment :)

Monday, 30 December 2013

Helms Deep- The deeping wall

As per usual, i haven't been regularly blogging like i said i would..
and for that i apologize.

However, that doesn't mean i haven't been busy!
In fact, my last few weeks have been a hive of hobbying madness- including Empire, Daemons, and numerous other ventures. But this post is just to try and get up to date with the big-ass helms deep project :D

I had intended to do smaller, regular updates detailing exactly what i was doing that day/week and how i made each individual section of the fortress.. so that if there were anyone else, like me, undertaking such a task they would practically have a step by step guide that they could follow, rather spending hours trying to decide how it is best done- like i did. 

That being said...

It turns out, I'M WAAYYY TOO LAZY!

So again, sorry guys.. looks like you'll have to figure it out on your own! (but i'll try to post a shed load of work in progress photos with captions to help)


 So, after casting up loads of blocks I started assembling the wall. I used the wall builder mold (obviously) to make the process alot quicker!!

I found that on the bigger pieces a hot glue gun works better than pva, although it means you have to work quickly.


I used random blocks of polystyrene to add some rigidity to the wall sections.


In total there are three sections.. the end two are three wall builder panels long, and the removable middle section is two panels long.


I started gluing the hirst arts Octagonal tower blocks together.


I added a cardboard cut out to act as a base for the polyfila floor and added the top decoration...


 as well as the small tiles (i think originally intended for the towers archway windows) to fill the gap between the tower and wall section.

One wall section nearly complete.. although not actually glued together.


Now for the Battlements...


I experimented with two different ways to make the battlements for the tower.

First i tried sanding down the angled blocks to create a sloping top.

Then i tried using the small blocks with sloped tops and sanded them to fit together at angles.

Basically two different ways to achieve the same result, but i preferred the second approach. All that is required is a little polyfilla to fill the gaps.

Next i made the 'destroyed end'.

I used polystyrene offcuts to fill out the ends (this required alot of pva).

Which i then cut into shape with the hot wire cutter.


Then i smothered it in polyfila.

Its all coming together.

The battlements for the straight wall sections were made using the sloping blocks from the octagonal tower mold. This was actually harder than i expected as they had to be sanded together to make the flat.. which took several failed attempts (in the picture above you can visibly see one which failed- and was later thrown away). 


NEXT ONTO THE PAINTING!!!


I used wall paint from homebase, as i was crazy cheap and available in large quantities.. the only problem is its very thick so need watering down a little and i'm unsure how durable the paint job will be.. although i would have expected it to be fine.. its used in houses after-all.

Slate grey was used for the base coat and Dove grey for the heavy dry brush over the top. No undercoat was used as my spray primers would have melted the polystyrene inside.

First i painted in between the gaps.

And then the entire wall.

Next a heavy dry brush 

The Culvert, ready to be blown apart.

The removable section was made using basic blocks and the archway blocks (i forget which mold they were from). The battlements were glued together using plenty of PVA.

Woodland scenic's liquid earth pigments were used to weather the walls and to darken the gaps between the brickwork.

The Finished wall- minus the unpainted tower.


And that's the project up to date!!
There is still alot more to do but i am beginning to get an idea of how it'll look once complete.

I'm taking a short break from the building but will at some point start work on the outer keep walls and the tower of the Hornburg!! (which is probably going to be huge!).

Let me know what you think!! 


   Until next time :)


Tuesday, 22 October 2013

The start of the big project! - Helms Deep

Well look at this.. two posts in one week!!
hmmm... I wonder how long I'll keep this up for.
:-)

Anyway, I mentioned in my last post that I had started a big new project- exciting stuff huh?!


And so here it is..


Yep, thats right..
Helms deep (i realise you could probably guess from the posts title, but meh).
The basic plan is to make a helms deep gaming board large enough to play War of the ring, lotr sbg and possibly even Warhammer on. This means that it has to be fairly big! After all, recreating the battle of helms deep would be rather underwhelming if it was only just about big enough to hold a few troops- wouldn't it!

In fact the size has to be quite specific, as in order to play war of the ring- a gaming system i've recently started playing alot- the walls, causeway and interior have to be big enough for the company movement trays to fit on/in.

The first thing to do was decide what i'm going to make it out of.
Years ago i actually made a helms deep board using polystyrene, but as i was very young at the time it was abit crap. But i did learn alot about working with polystyrene and its limitations. Although cheap and light it was also very fragile and didn't look very realistic.

So i started looking into alternative materials, such as foam board etc. That's when i stumbled across this stunning helms deep board -->

This beautiful piece of art was made By Onyx and i hope he doesn't mind me posting a picture of it on here without permission but it is so good i just had to upload it.
I will however give him a proper shout out by posting this link to his blog where he explains how he went about building it.
http://onyxworkshop.wordpress.com/about/helms-deep/

The great thing about his blog is that it details the entire build, from start to finish, and therefore practically gives me a step-by-step guild to try and build my own. Onyx's board was built from plaster, cast largely from Hirst arts molds (or is it moulds?). The good thing about Plaster is that its durable, widely available and easy to work with. And casting it using the Hirst Arts molds means that every section is identical, even if i'd have to build it Brick by boring brick. It was at this stage where i couldn't decide whether or not i should cast the bricks using resin or plaster.. resin is lighter and maybe stronger, i don't really know, but i have no experience using it.. whereas I've cast using plaster before- albeit years ago. So after a trip to the local hobby store i decided to sit on the fence and buy resin-plaster :-D (by gedeo if your interested)

Now then, i have no intention of building a carbon copy of onyx's board... As awesome it is, i'd like to put some of my own ideas into it and since i'd specifically like to play war of the ring on it, it'll have to be a bit different anyway.  Not only this, but i want to include my Resin Helms deep gatehouse that i bought from games workshop years and years ago.
 
This will save me all the hassel of having to build my own gatehouse, but does mean that my hornburg will be larger- as the walls curve much more gradually.

The next step was to buy all the molds i would need and the plaster..

Hirst Arts do a fantastic range of molds and although fairly expensive (particularly when considering shipping to the UK) are well worth the money and i highly recommend them. With the price in mind however, i wanted to keep my molds used down to a minimum and so after some careful consideration i chose the four which would be most useful and ordered them.


In the picture on the right you can see the molds :-)


They are:
Basic Block Mold #40   
Octagon Tower Mold #63 
8″ Round Tower Mold #64    
Wall Builder Mold #200     


Once i had everything i needed i started casting blocks over the course of the next couple of weeks, whilst experimenting with different ratio's of water vs plaster, to get the strongest cast.


Well, thats gonna be about it for now, as it's late, I'm tired and this post is already longer than i had intended anyway
 I shall post again either later this week or early next week- I've actually made quite abit of progress with this project already and would like to try and get the blog up to date- Stay tuned and all that jazz.


Saturday, 19 October 2013

And we're back! - Goblin Shaman

Right..
so after an absolute age of no new posts (tbh i even forgot i had a blog)
i have decided to resurrect the old thing and hopefully get into the habit of posting on a regular basis- i know, i know.. we've all heard that one before, right? 

But anyway, now that my friends and fellow gamers/modelers/painters are spread out around the country, at uni and other things, it makes sense that i start posting pics of what I'm getting up to these days, so that they can have a gander at them and feel comforted in the fact that i haven't given up on the hobby altogether.

So to kick off.. we have my Goblin Shaman for my planned Orcs and Goblins army..

Goblin Shaman.


I actually bought this guy ages ago, when the new models came out..
(I also bought the big boss, cos both models looks very cool in my opinion) 
 However i have literally only just got around to painting either of them as i took a break from painting and instead pretty much just started collecting every army i could possibly think of. 


The interesting thing about this particular model is that i tried out a new technique (well for me anyway) and painted him using pretty much only washes and glazes.

Now, I've used washes before.. in fact they're one of my favorite painting techniques..
but I've always used them in moderation, whereas for this guy i wanted to see if i could make a model look decent using them almost exclusively.  
A close-up on the cloak (or is it a cape? hmm..)

Fortunately Games Workshop do an excellent range of washes and glazes, which i have only recently had the pleasure of trying.
(Up to now I've always made my own but that requires more effort and produces a far inferior effect).

One thing i found with using washes to paint an entire model is that the model has to be primed using white (or a similarly light colour). This means that when the wash flows into the recesses, it leaves the raised edges much lighter but still stains them the colour your using.

This is most pronounced on the cloak and skin. 

Fortunately for me, I always prime using white anyway.


The Cloak was painted using progressively heavier layers of Druchii Violet and Carroburg Crimson (love these two colours). These were applied directly over the white primer, without any base coats. The Druchii Violet was painted directly into the deepest recesses and allowed to pool towards the base of the cloak. 

The cloak is personally my favorite part of the model, and i was very happy with the end result.. plus it was crazy quick to do and took almost no effort, a definite win :-)

The other noteworthy part of the model is probably the skin. Unfortunately, i can't remember exactly how i did this, as i paint pretty much every green-skin model differently, however, i believe it was just a number of washes of Biel-Tan green.. although it is entirely possible that there was a base coat 'wash' of watered down goblin green first.

The picture to the right demonstrates how the washes leave the uppermost raised edges much lighter, almost white, and therefore if done correctly can completely negate the need to use time consuming highlighting techniques.

Apart from those parts already mentioned, there wasn't really much to this model..

The hair was painted the same way as the cloak (this will likely be the colour i use to tie my whole army together),
the vest thing was painted using Guilliman Blue
the rocks were simply painted codex grey
and the bones/ropes etc.
were just left white.

The entire model was then finished in my usual way- with Army painter quick shade, strong tone- this added further definition to the recesses and darkened the overly bright nature of the washes straight over the white primer.

Finally the base was painted with watered down Abaddon Black and the model was given a couple of coats with the army painter anti-shine matt vanish.

Altogether i am very pleased with the look of the lil guy and he only took me a couple of hours to paint, if that!!

Like i said at the start of the post, i will try and get into the habbit of uploading more regularly as i have some extra hobby time now, which i'm using to get some old models painted as well as starting a few new exciting projects (well really, one BIG one).. but i'll go into that in the next post :-)

As before feel free to comment, I'd love to know what you all think.

Tuesday, 17 July 2012

Empire Witch-Hunter


I wonder if you can guess what this post will be about... ? .... 
any ideas? .. ogres perhaps? .. more maneaters maybe?.. 

AHA!.. you have fallen foul to my masterfully conceived trap!!! Mwhahahaha...

yeah.. i agree, lets cut the melodrama.. 
so to business...

today we have, the 'new' empire witch hunter!


i've had this model since it came out a few months ago.. i actually pre-ordered it.. not that i intended to use one in my army, i just liked the model (although he does currently act as my general of the empire)..  
I also painted this model more or less as soon as i got it.. which means this is hardly an up-to-date post, i just didn't have any photos of it until now...
I chose to stray from the GW paint scheme slightly as i didn't want him to be overbearingly red.. i was aiming for a slightly more 'Van helsing' type look.. although i still wanted to hint my armies colours.


This model was actually the first finecast model i ever bought and i have to say that sadly it lives up to its rather unfortunate internet nickname 'crapcast' (and all the other variations). The model needed a fair bit of green stuffing to repair it.. such as fixing the cloak (which had a big hole in it), the hat (which was broken) and rightside of his face and nose (which was just a mess) and countless air bubbles across the model. Although this was fairly easily solved with some greenstuff and abit of patience, its still not the sort of thing you want to be required to do to a new model. It did however give me a chance to try out the liquid greenstuff for the first time and i have to say i liked it alot, makes filling in gaps alot easier and quicker!
This model was also the first time i tried out the army painter quick-shade system, which i've already spoken about in another post... although as it was the first time i tried it, i did nearly completely ruin the model...
let me explain..
I spent ages painting up the model, applying my own highlights and shading as normal, with the intention of using quick-shade to add further definition. After dipping the model and letting it dry i realised that i'd forgotten it would come out shiny.. so i bought some army painter matt varnish spray and coated the model the same way i would with games workshop primers.. and watched in horror as the heavy coat wrinkled and deformed. As a result i had to carefully scratch of the wrinkly bits, reapply some of the paint, brush on the quick-shade in those places and then lightly 'dust' with matt varnish. I should note that i don't blame the products (which are excellent) it was simply me being a ponce!

So yeah.. thats it for this post!
i've got some more models ready to blog but need to grab the camera first..
so i'll try and upload something next week!


Wednesday, 4 July 2012

Maneater conversions- Boxing ogre


Well, as promised i have another maneater... the boxer!

If your anything like me.. which to be fair, your probably not..
you would have picked up the ogre bulls box, examining the ironfists on the sprues.. and gone straight for the one that looks like a solid iron boxing glove (probably whilst mouthing the lyrics to the final verse of a certain Simon and Garfunkel song.. i'm sure you can figure out which one)

well this gave me an idea.. how about an ogre, that is so confident/violent/psychotic that instead of dispatching his enemies with a sword, or even perhaps an axe.. he would much rather bludgeon them to death with his own, allbeit metal encased, hands..

naturally, he would have to be a maneater..


this 'conversion' was very easy.. really more of a kit bashing than anything else.. it uses the body and ironfists from the ogre bulls set and the head and arms from the mournfang box.. as i found the arms were generally more dramatically posed than in the bulls box..


A very small amount of greenstuff was needed to fill in the gaps between the arms and the body.. clearly games workshop didn't consider interchangeable parts when they made this set.. but it was easy enough to sort out so can't really complain..

more greenstuff was needed to cover up the right hand... as all the ironfists where made to be left handed.. apparently there aren't many ambidextrous ogres wondering around the place.. so a small blob which i flattened out and voila problem solved. 


Alot of the character of this maneater however will have to come out in the painting and basing... i plan to paint him splattered with blood (although trying to figure out how to make it look right, as alot of blood effects on models look terrible) and i'm thinking maybe a rather battered looking body lying on the floor in front of him..
 

i don't know when i'll post something next, as i'm away all weekend.. but i'll try and get something up on monday.. I just finished 3 ironguts today, so they will be added to the mounting list of models i've yet to blog..  on the brightside, it gives you all something to look forward to.. in theory

let me know what you think of the maneaters so far.. i've just figured out an outline for the last 2 and am also considering converting my own tyrant as i'm not overly keen on the gamesworkshop one..

stay tuned.