Wednesday, 6 August 2014

Helms Deep- Landscaping


In reality, i was probably abit premature saying there was 'light at the end of the tunnel' in the last post... as i continued working i realized there is still alot more to be done!

But it is once again that time when i remember to update the world on my current progress with the project. As well as slaving away at the fortress, i have also starting play testing rules/scenarios and building/painting the forces which will do battle in the big opening game on the board... i have been given a three week deadline (yikes!!).


I used a variety of woodland scenics rock molds to build up the cliffs.


A few 'scraps' from pieces i broke making the wall were added to make it look as if it were built from the mountain.

Care was taken to ensure the rocks didn't interfere with the placement of the wall sections.

Pollyfilla was used to fill in the gaps and make it you seamless.

I found that ready mixed filla worked best.


The steps were made from polystyrene and cardboard covered with pollyfila.


Having been playing wotr quite abit in the last few weeks i decided i needed a modular gaming table on which to fight my battles... i did check out the realm of battle board and nearly passed out at the price, even on ebay it was still pretty pricey! So, i decided to make my own!

I was determined to include some of the same details but chose to design mine so that it could also be used for basing helms deep.

First i bought 8 mdf boards (the other 2 i haven't started yet)- 2foot square- for just under £20 :)

I used ready mixed pollyfilla to create the rocks.


I had to cook the sand in the oven to dry it out before use .. this got a few odd looks.

Next i textured the boards with sand.

Somehow this step took almost all day.

I used a spray bottle filled with watered down pva to speed the process up.

After drawing in the detail, i used a knife to carve the rocky outcrops.

Spray paints were used to paint the board and undercoat the rocks.

My board had to be flat (unlike the realm of battle) so helms deep could sit on it.

The rocks were drybrushed grey.

I used paints i had lying around.. but this could be achieved using game workshops paints.


I also repainted my hill to match the boards (i've lost the other half)

The boards still need flocking and in reality should be drybrushed to bring out the detail but at the moment i really can't be bothered.. i may try dusting it using spray paints instead..


I started basing the Uruk hai and movement trays.

There is still alot more to paint.

This isn't the entire army.. and when finished it'll hopefully be huge!!


So thats it so far..
I have already done even more to it than shown here, but i'll save that for another post.. being the summer holidays, i am in a haze of hobby madness before work starts again in September.

Sunday, 1 June 2014

Helms deep- Light at the end of the tunnel

SO... admittedly, very few posts as per usual but lots and lots of progress with helms deep, so swings and roundabouts. The project is now approaching completion, with most of the main structures finished and ready for painting (which should happen this week). This post will largely be a long list of pictures from different stages of the build, so if you have any questions about how it was built then just leave a comment.   

 In order to solve the problem i was having with the arches i scoured ebay and found the Hirst Arts Gothic Additional Accessories Mold #44


With which you can also cast these doors :)


 The inner wall under construction... i later used cardboard spacers to support the wall (in a similar way to the deeping wall sections).


 Inside the walls there is enough space for a wotr company to move around.


 The three decorative pillars were later cut to size.


Making the Gate.

A cardboard strip was used as a base for the floor.

Once dry, these gaps were filled with polyfilla.

After raiding the fish tank, the damaged wall section is almost finished.


Still in construction... the tower is slowly growing.


Its all coming together :)

After the pollyfilla.


Just another angle... i got abit picture happy.

Building the mountain... i used cork tiles for the base/sides.

landscaping... polystyrene makes up most of the base.
A newspaper core was covered with plaster bandages and then hard plaster was poured/brushed over the top.
Spray painted black for an undercoat, ready for painting.
man-made-mountains.... newspaper is used for the core of the mountain.


 And that's the project to date. I still need to raise the height of the tower, pollyfilla the floor of the keep, construct the stairs in the courtyard, create another couple of mountains, the causeway and the bases... not to mention all the painting.. so quite a bit.. but its getting there.

Feel free to comment. :)

Sunday, 2 March 2014

Helms Deep- A weekend of progress!


In a manner most unlike me, i have been incredibly productive this weekend and as a result have made plenty of progress with the helms deep terrain project- it'll be interesting to see how long i can keep this up for!


As with before, this post will mainly be a long list of pictures but i shall do my best to provide some sort of commentary-type-thing, explaining whats going on.


Firstly, i decided to break the mold in the way that i work and make a plan.. so, out came my trusty black marker and i set to work on the base for the keep. Being built into the side of a cliff, the base obviously would have to be quite high, so i rummaged around the garage and found some large sheets of polystyrene.


 I shaped them with my hotwire cutter and with a heated knife for the larger sections.


The sheets were then glued together with a generous helping of PVA and left to dry.


On to the outer wall...


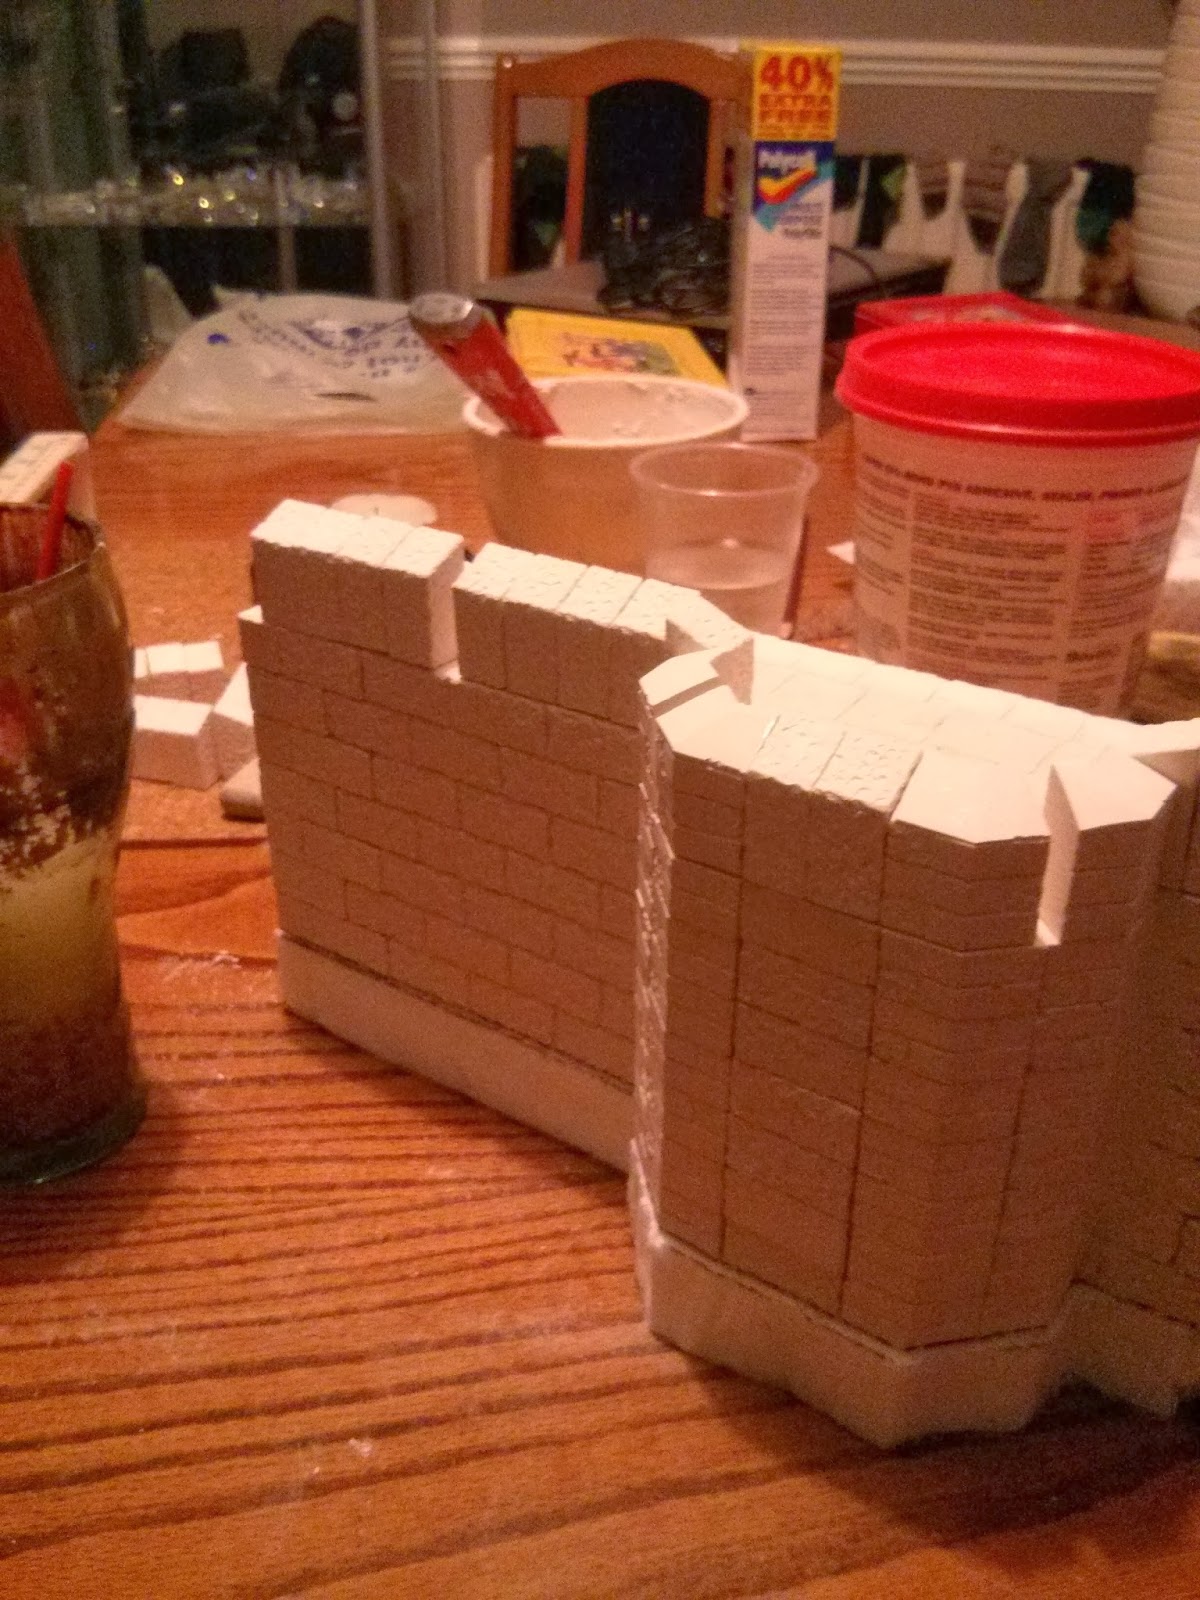
Some more wall-maker panels were cast and glued to create the wall leading to the tower of the hornburg.


In order to make the wall bigger on the inside than on the out, i extended the interior with some basic blocks and the outside with polystyrene (ready to be shaped into rocks later).


Using blocks from the 8" circular tower i created a curve to the end of my wall section so that it would connect with the games-workshop gate house that i showed in the first post.

This was actually alot harder than i had expected, as the blocks have a nasty habit of not lining up straight and therefore required plenty of sanding to make level. (it should be noted that this 'problem' comes from my casting technique and not the quality of the molds.)


The curved wall and the tower (made from the octagonal tower molds as before) were secured using LOTS of glue from the hot glue gun and even abit of pva. The gaps were then filled using polyfila at a later date. 


By now it was getting very late, but i wouldn't stop until i'd finished the section.. dedication eh?


so i made some supports for the flooring out of some thick-ish cardboard, securing it with pva and the glue gun.


In hindsight i should have let that to dry first but in a rush to go to sleep i started covering the top of the wall with polyfila and doing my best to smooth it flat.


The next day i penciled on the floor tiles and using an old knife (not the one in the picture) i began to carve out the gaps between tiles. This alone took a silly amount of time but looked very effective when finished.


The next job was to create the battlements. In general these were created in exactly the same way as i did with the deeping wall.


 The one exception is the damaged and repaired section pictured here. To create this i found some miscasts that i'd kept from my early casting experiments and am planning on using either greenstuff or even small gravel to finish it of...


Clearly still a work in progress but certainly the making of a nice detail.

The build so far.. (minus the flooring and battlements)


After all of these photo's i actually raised the height of the cliffs further to make the keep even more imposing. The next jobs will probably be to continue working on the tower, which can be seen in some of the pictures and then to create the inner keep.. i started messing around with the blocks to check the size of the base etc. (shown above).

anyways, for now i'm tired.. and i've already inundated you all with enough pictures for today.. so until next time, i hope you're enjoying the project and accompanying blog- feel free to comment :)